Beech 18 Spar Corrosion and Cracking
The Beech 18 wing spar has been a source of many discussions and several airworthiness directives over the years. There is a lot of good information out there and there is also a lot of misinformation as well. I hope I can help to clear up some of the misunderstandings.
There has been some confusion about the Beech 18 wing issue and I would like to make it clear, that in my opinion, the Beech 18 wing spar combined with a spar strap reinforcing kit makes for a good solid, strong and safe combination.
Just like all other aspects of aircraft airworthiness and safety it is imperative that the wing spar and the wing spar strap, is properly inspected and maintained in accordance with AD 72-27-09R2, spar strap manufacturer's instructions for continues airworthiness and good common sense airworthiness practices.
The wing spar issue started back during WWII when cracks started showing up in the AT-11 bombardier trainer aircraft. The AT-11 was the first to show the problems because of the high takeoff and landing cycles typical of bombardier training. These problems were addressed by the factory in combination with the Army Air Force and a variety of fixes were tried. Cracks were also a result of hard landings and ground loops. Excessive loading from hard landings and side loading from ground loops distort the spar and can start cracks or cause existing cracks to propagate.

Here is a photo of my personal Beech AT-11 when she was at Midland Army Air Field in Midland Texas. On February 3rd, 1945 this beech was involved in a takeoff accident where the pilot lost control and ground looped. Note the angle of the right main landing gear. The Beech 18 was rarely used for multi engine training because it required a higher than average level of skill to fly. The military recognized this and as a result the Beech 18 was typically used for advanced training of Navigators, Bombardiers, Gunners, Aerial Photographers etc. The pilots who flew these aircraft were veterans or students that showed the aptitude to be able to handle the Twin Beech. This photo shows what happened to a lot of Beech 18's both in the military and in civil service.
The lessons learned during WWII were incorporated into the immediate post war aircraft starting in late 1945. The spars on the D model Beech 18's (D-18C and D-18S and until the end of the production line) had spars that were made from thicker walled tubing and were substantially stronger than the wartime C model Beech 18's. This stronger spar helped to reduce the cracking but it also gave the aircraft higher gross weights.
In my opinion other modifications to the Beech 18, and there were many, added to the reputation of the Beech 18 as being a bit hard to handle on the ground. Everyone wants to fly faster and one of the ways that you can get a Beech 18 to do that was to change the angle of incidence of the horizontal stabilizer.
Here is the latest proposed revision to the Beech 18 wing spar AD.
This is the start of a page about my experiences with Beech 18 spar corrosion and cracking problems. This is a work in progress so please bear with me.
If you have any experiences, photos or other documentation that you would like to share please let me know as I will gladly post pertinent information about this important issue.
There is a good discussion about Beech spar issues on Kyle Larson's web site here.
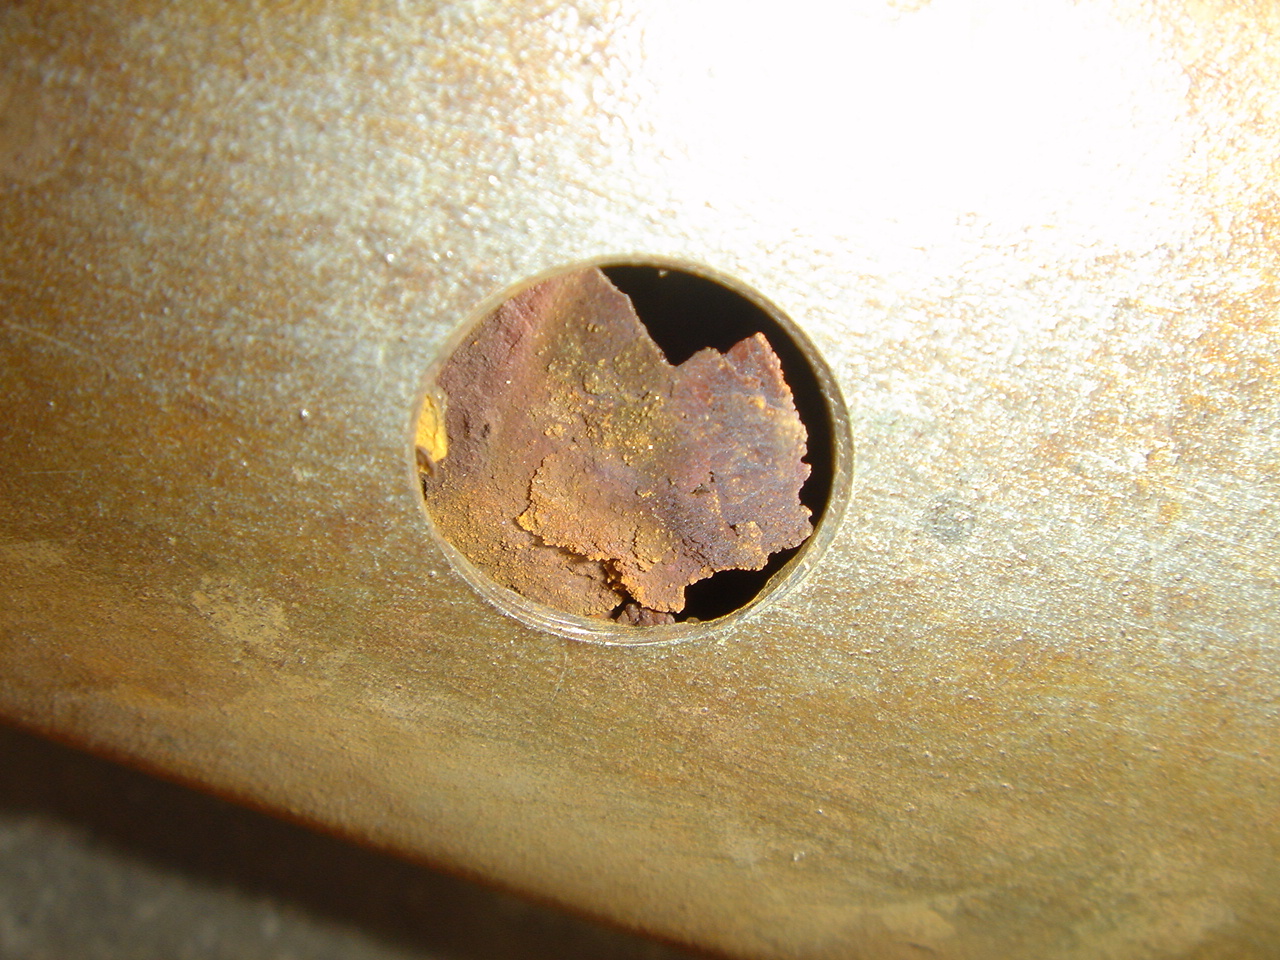
We have an AT-11 in our shop that has just begun a full restoration. We soon found a major problem with the spar truss. We found a hole in the lower spar cap that appeared to have developed from internal rust. The hole was initially about 1/16 of an inch and with simple probing it quickly grew in size and rust scale dropped from the hole. We had scheduled an x-ray but the owner, after seeing the debris from the hole, decided to cancel it as he wanted the entire spar replaced.
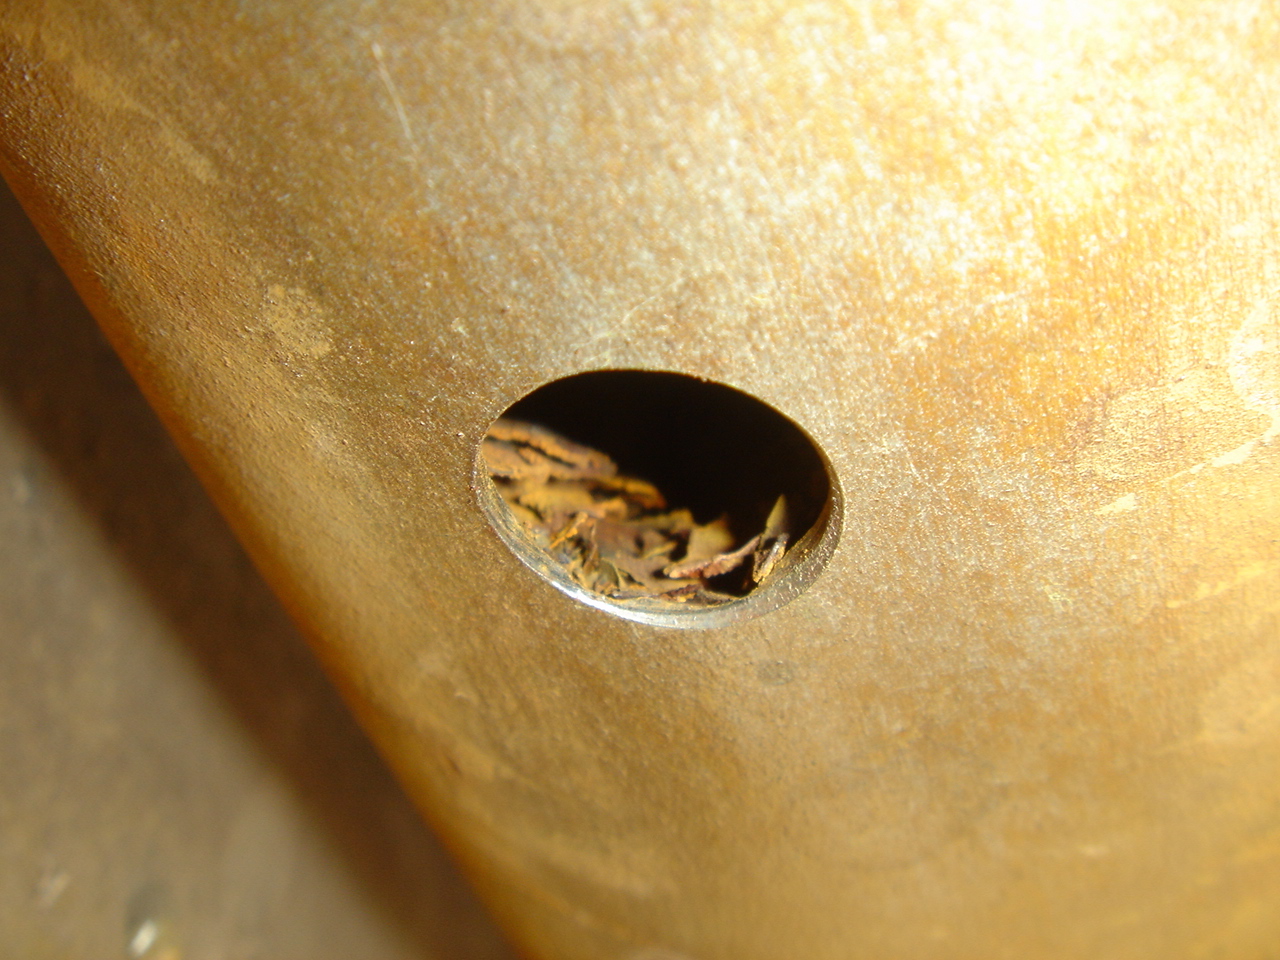
We drilled out the hole to 1/2 inch to put a bore scope inside and found extensive scale throughout.
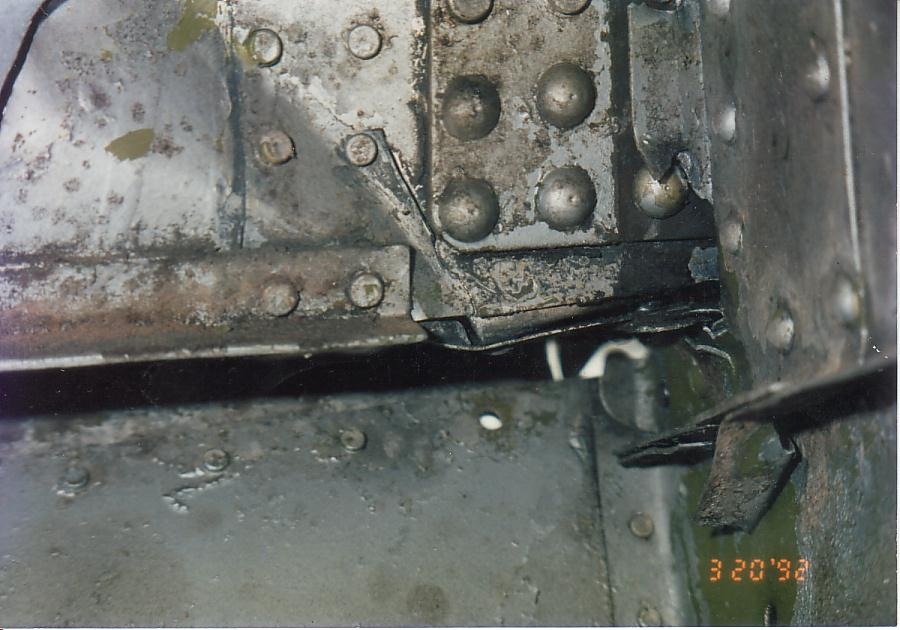
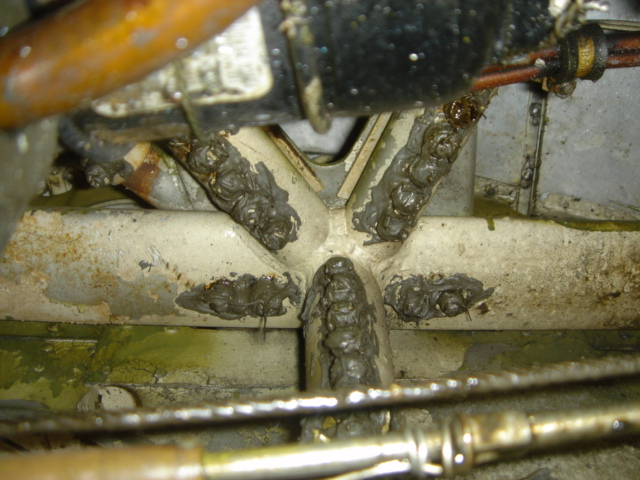
This aircraft had a modification done to it in 1952 or so that was intended to strengthen the spar in the slide tube cluster area in the gear well. This modification involved drilling 10 holes for bolts through the lower spar cap and the same number through the vertical and cross tubes. A gusset plate was installed to strengthen the cluster. This drilling has opened the inside of the truss to the atmosphere and has allowed moisture to enter the spar.
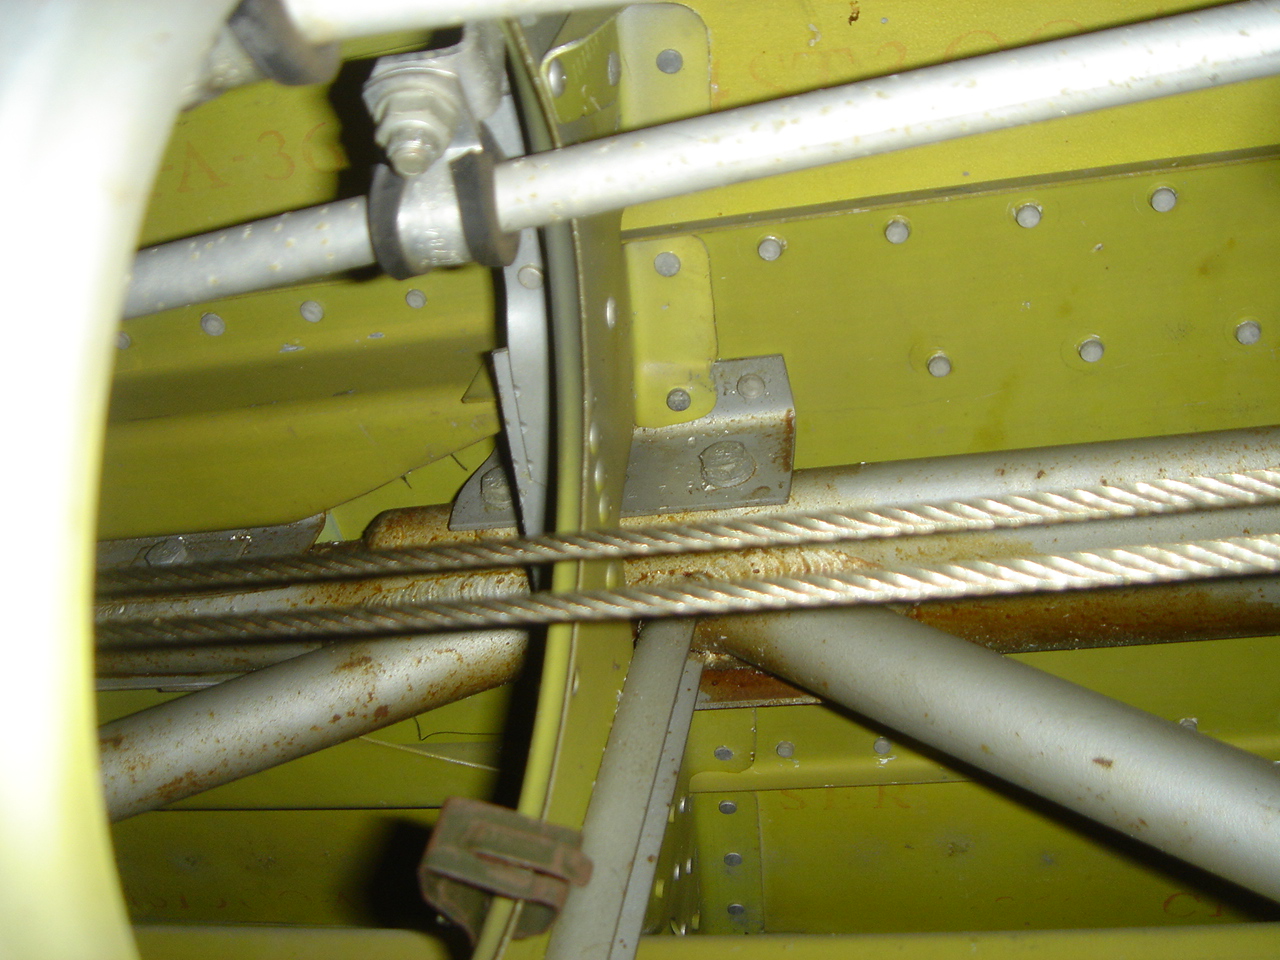
These shots show the Air Force modification to the slide tube cluster area. The plates with the zinc chromate on them are the gussets for the modification. You can see the nuts for the bolts on the bottom of the spar visible in the lower right corner of the picture.
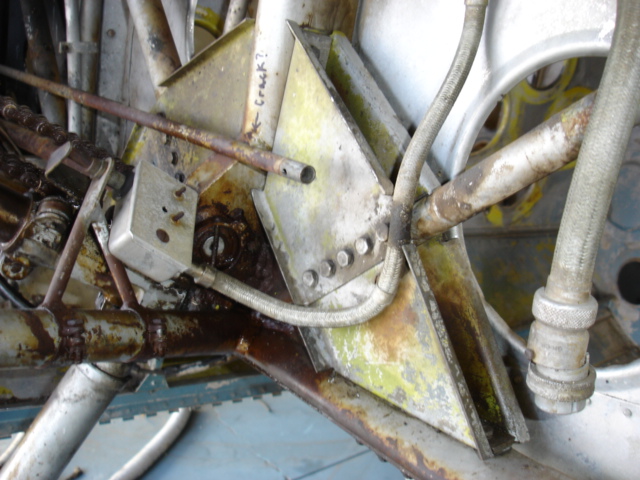
Notice the bolts holding the mod in place. Beech 18's with the STC'd Volpar tri gear mod have similar holes drilled into the truss (not through the lower spar cap though). These holes were sealed but the sealant may have dried out over the years allowing moisture into the truss.
I know of three AT-11 or C model aircraft that have had this modification and all three have the same internal rust problems. I am concerned that any other aircraft that may be flying with this modification will likely have a spar with greatly reduced strength. If you have a WWII ex military or C model Beech please look in the gear well for this modification. If you need help identifying it just let me know and I will gladly help you with this. If you have an aircraft with this mod please have your spar x-rayed immediately.
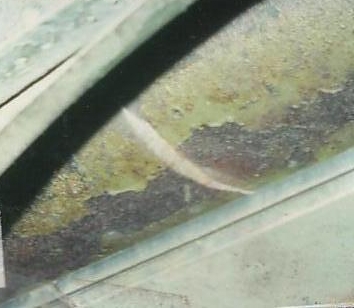
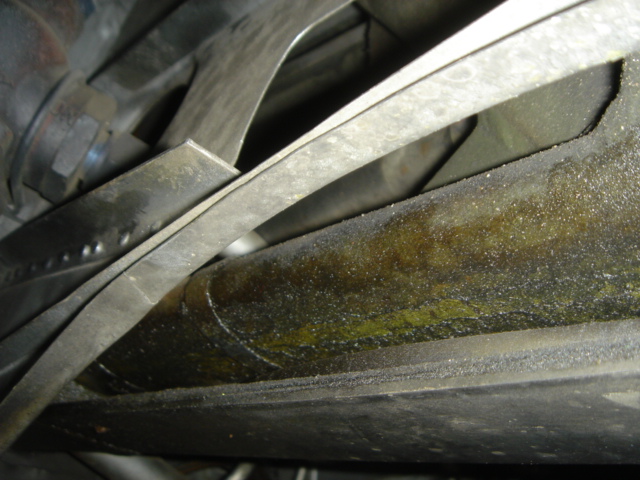
One of my biggest concerns is for the aircraft that may have been x-rayed when the AD became final in 1975 and have not flown 1500 hours since. This means that the inside of the spar has not been looked at in 30 years! What if the x-ray that was done in 1975 was performed by someone who didn't know how to interpret the films properly? Your spar may look like the one below. You should have your old films looked at by Gail Flagor or Mr. Buschke or other reputable Beech 18 X-ray technician.
I think that this example is a special case but I also think that this is a look at what our spars will look like in the future. I am sure that we will find several aircraft that have similar problems and are still flying. This is why I think that a revision to the existing AD based on a calendar inspection is warranted.
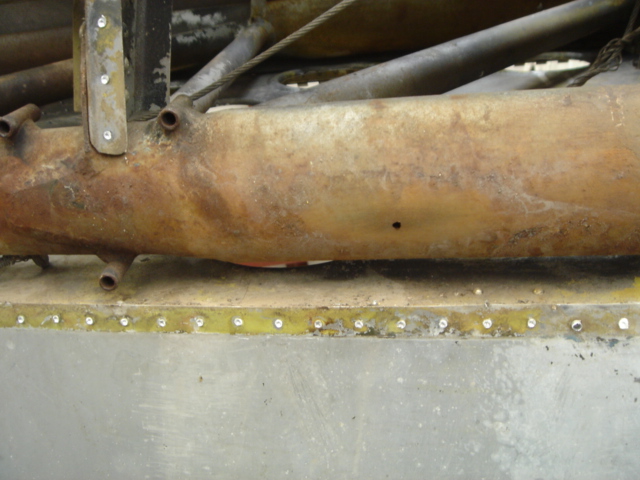
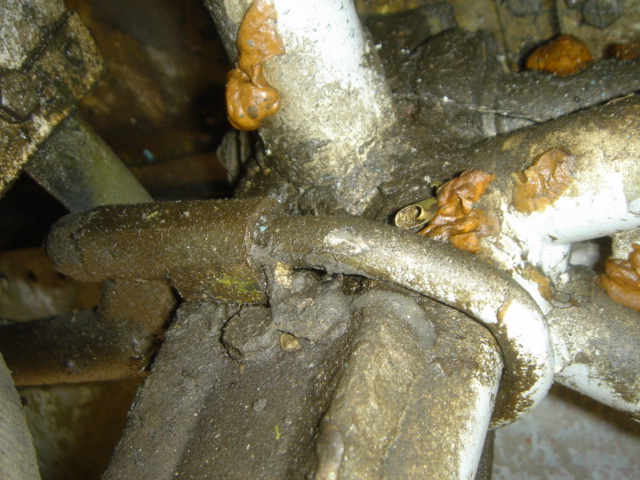
This shot shows the initial hole found in the lower spar cap just inboard of the jack point.
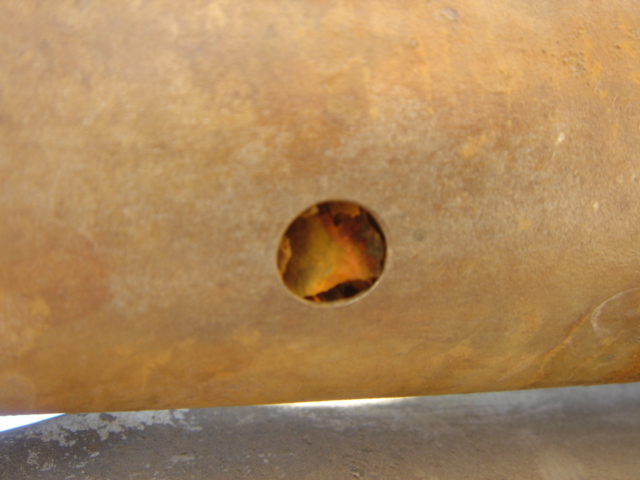
The hole was enlarged with a unibit to 1/2 inch. You can see the scale that has built up inside the steel truss.
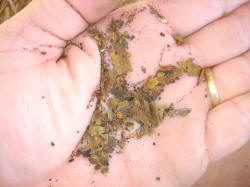
This shot shows the debris that falls from the hole when stirred up with a probe.
The flakes are too big to fit through the 1/2 inch hole. The wall thickness of the spar cap is nowhere near .090.
Note the buildup of debris. Imagine how Much degradation was needed to finally breach the entire wall thickness of the lower spar cap.
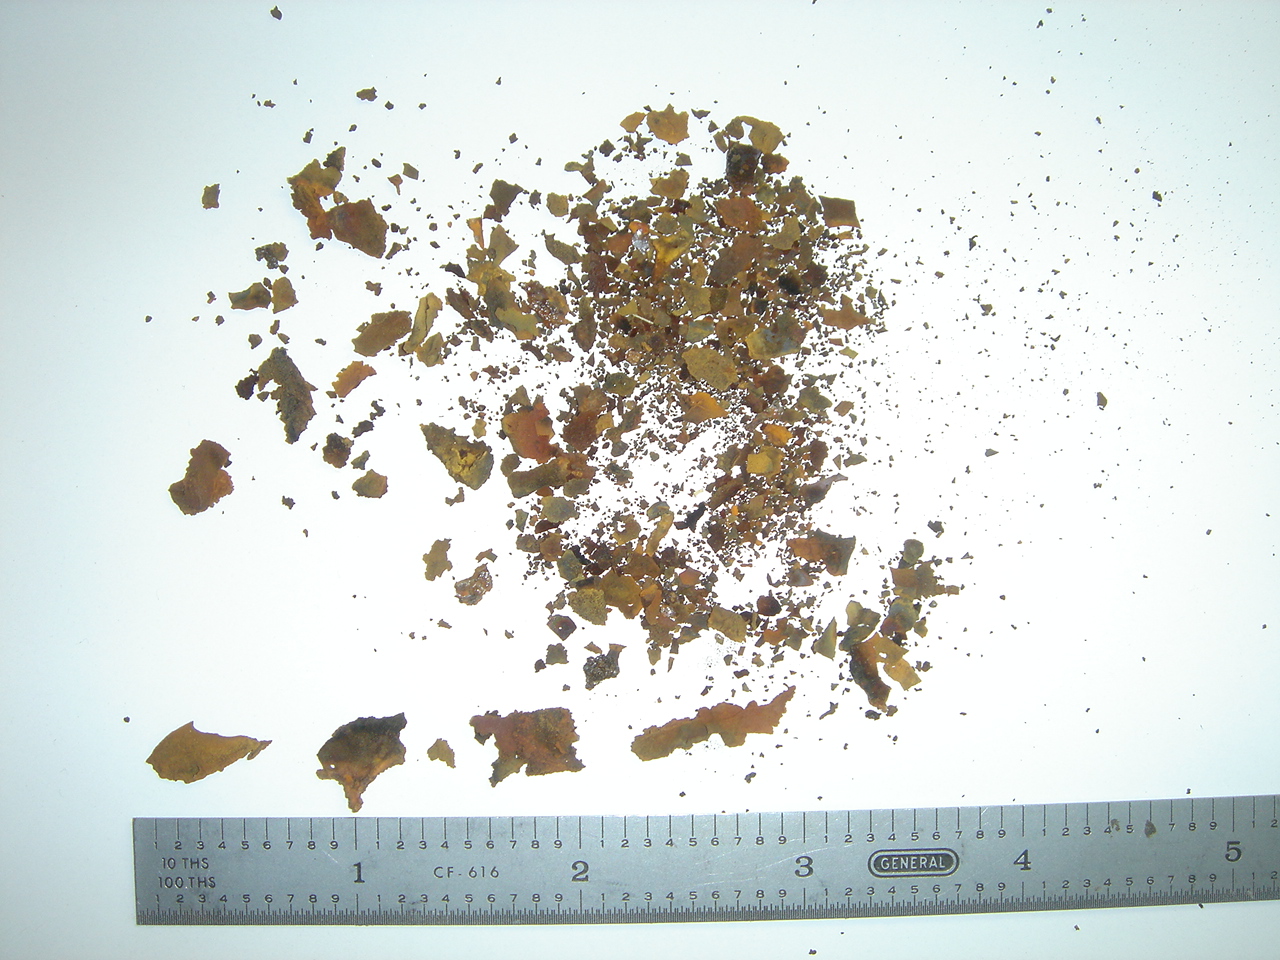
All Debris

Debris Sizes
Some think that cracking is no longer an issue but to me cracking is a bigger issue than before.
There are several ways that these spars can crack. One is from side loading on the landing gear from loss of control on the ground and ground loops. Another way is in a hard landing or stalling and dropping her in on the runway. Impact damage on the wing can also cause cracking. For example; an aircraft taxis into a building or other structure or runs off the runway and hits an abstacle. I have seen problems in an aircraft that was hit by a tug. Excessive twisting on chain tie downs in severe winds may also cause damage.
The Twin Beech has a reputation for being hard to handle on the ground. In my flight instructing in the Beech I have seen a lot of students loose control and I have had to intervene on countless occasions. This is the nature of the beast and it is one of the reasons that I love it. You cannot let your guard down in the Twin Beech even for a millisecond, for if you do, she will get your attention back in a hurry. She requires constant attention and respect to keep her and your passengers safe. This also requires currency and re-currency of the pilot to keep on top of his game in the Beech. For me, I feel that if I haven't flown the Beech in a week I am rusty. Even after flying rides at air shows (15 minute rides all day long) it takes me a while to really get back in the groove. I have had many shows where I will fly 20+ take off and landings in a single day and after several of these sessions I slowly begin to feel current. My Beech is a military RC-45J that is full of radios and gear so she is heavy. If you are not careful she can, and will, do things that you don't want her to do. On the other hand the Twin Beech is an awesome aircraft that can do things that other aircraft couldn't dream of. Walter Beech and Ted Wells should be proud of their fantastic design.
It is the issue of currency that concerns me for the following reason. I know that many Beech's are not flown that regularly and I often wonder if they may be subjected to some of the hard landings as described above. If you have a hard landing you need to make sure that your spar is okay. It is hard for some of our egos to admit to anyone that we may have really pranged her on the runway but you need to make sure that her spar has not been damaged as a result. There is an area where you can see evidence of hard landings and I urge you to take a look at it.
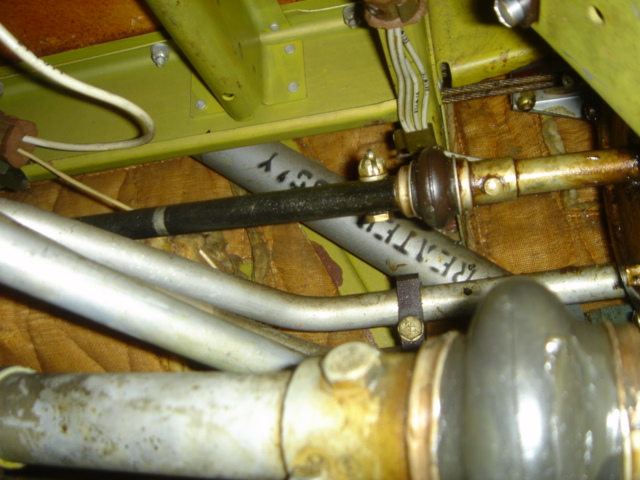
In the gear well just aft of the spar on the inboard side (wing station 61) you will find a tab that is welded to the spar. This tab is riveted to the wing rib that forms the inboard side of the gear well. It has the big lightening holes and is the outside of the fuel tank bay. On many aircraft that I have seen you may find cracks, distortion or even repairs. This is especially true of C model aircraft (1945 and earlier). This area was beefed up in later aircraft.
When I purchased my SNB-1 it had a stop drilled crack in this location.
Here is an excerpt from another web page about my experiences with the spar and the SNB-1:
Many decades ago, I had been told by some old timers that the spar strap AD was unnecessary and that the FAA brought it about because of one old freight dog aircraft that shed a wing in flight. I had become
complacent about the spar cracking problem.
 Not long after I installed the Aerospace spar kit on my Beech SNB-1, I had the main lower spar elliptical tube break. A friend who was an IA noticed the broken
spar while he had his head deep up in the right gear well and he called me immediately. I thought Paul was talking about the stop drilled crack in a wing rib near the fuel tank. When I took a look I couldn't
believe what I was seeing. Inboard of the slide tube cluster at the tip of a gusset, the lower spar was broken three quarters of the way around the tube and it was displaced one quarter of an inch. A vertical tube
was also severed between the upper and lower spar tubes and had been weakened from internal rust.
Not long after I installed the Aerospace spar kit on my Beech SNB-1, I had the main lower spar elliptical tube break. A friend who was an IA noticed the broken
spar while he had his head deep up in the right gear well and he called me immediately. I thought Paul was talking about the stop drilled crack in a wing rib near the fuel tank. When I took a look I couldn't
believe what I was seeing. Inboard of the slide tube cluster at the tip of a gusset, the lower spar was broken three quarters of the way around the tube and it was displaced one quarter of an inch. A vertical tube
was also severed between the upper and lower spar tubes and had been weakened from internal rust.
I am convinced that I, and my passengers, owe our lives to Paul and to the Aerospace spar strap. I don't know how long it may have been before I may have seen the crack as it was hidden by the strap. I am no longer complacent but paranoid and I now pre flight my spars. I now know that the stop drilled crack in the gear well was an indicator that things are moving around and is a good indicator of problems to come. After the spar broke, that area was broken out from things being on the move.
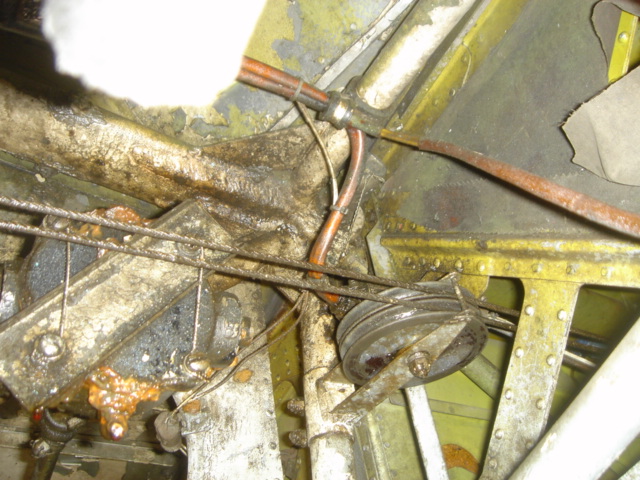
This experience is one of the main reasons that I purchased the rights to the Aerospace strap kit. I thoroughly believe in this product as it saved my life. This shot shows the same tab area broken out from the truss moving around and flexing after it broke.

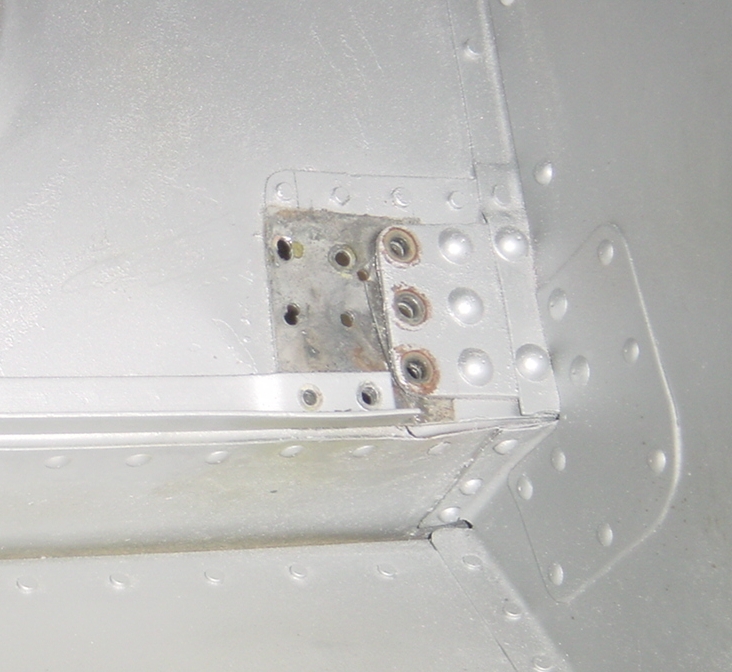
Above are two pictures that I have found to be a good indicator of spar troubles. This example is in an AT-11 that we are restoring in the shop. This picture shows the steel tab that attaches the spar to the number two rib outboard of the fuselage. This area is visible in the right gear well in this example and is next to the main fuel tank. The picture on the left shows a previous old repair that has also cracked out. The crack is small and may go unnoticed or may be disregarded as inconsequential. You can also see the deformation in the rib and the bottom skin. The shot on the right shows the same area after the old repair plate was removed. The original stop drilled crack is now visible. This is exactly what I had in my SNB-1 except that after the spar broke, this area was completely cracked out all the way to the lightening holes. This is a critical area to watch during inspections as well as during a pre flight. This problem seems more common in the C model aircraft but I have seen it in the D models as well. Beech even beefed up this area at the factory. The C models had spars made with thinner walled spar tubes which may have led to more flexing in flight and were more susceptible to damage during unusual ground operations.
This is just one indicator of spar problems. You may have other problems without this area being affected. an x-ray from a reputable company who is certified for the Beech 18 is the only way to be sure that your spar is healthy. Check your log books and see when the last x-ray was done. If it has been a while you are over due. The FAA is going to mandate that if your spar has not been x-rayed within the last 4 years or 1000 hours that you will be required to do it again. This is a good idea. If your spar is healthy after a current inspection then the issue becomes how often should we re-inspect the spar. Presently the FAA wants to do it every 1000 hours or 4 years which ever comes first. For some aircraft this may be a good idea but for others this might not be necessary. This is where we need to help the FAA determine what the criteria should be for establishing the repetitive inspections.
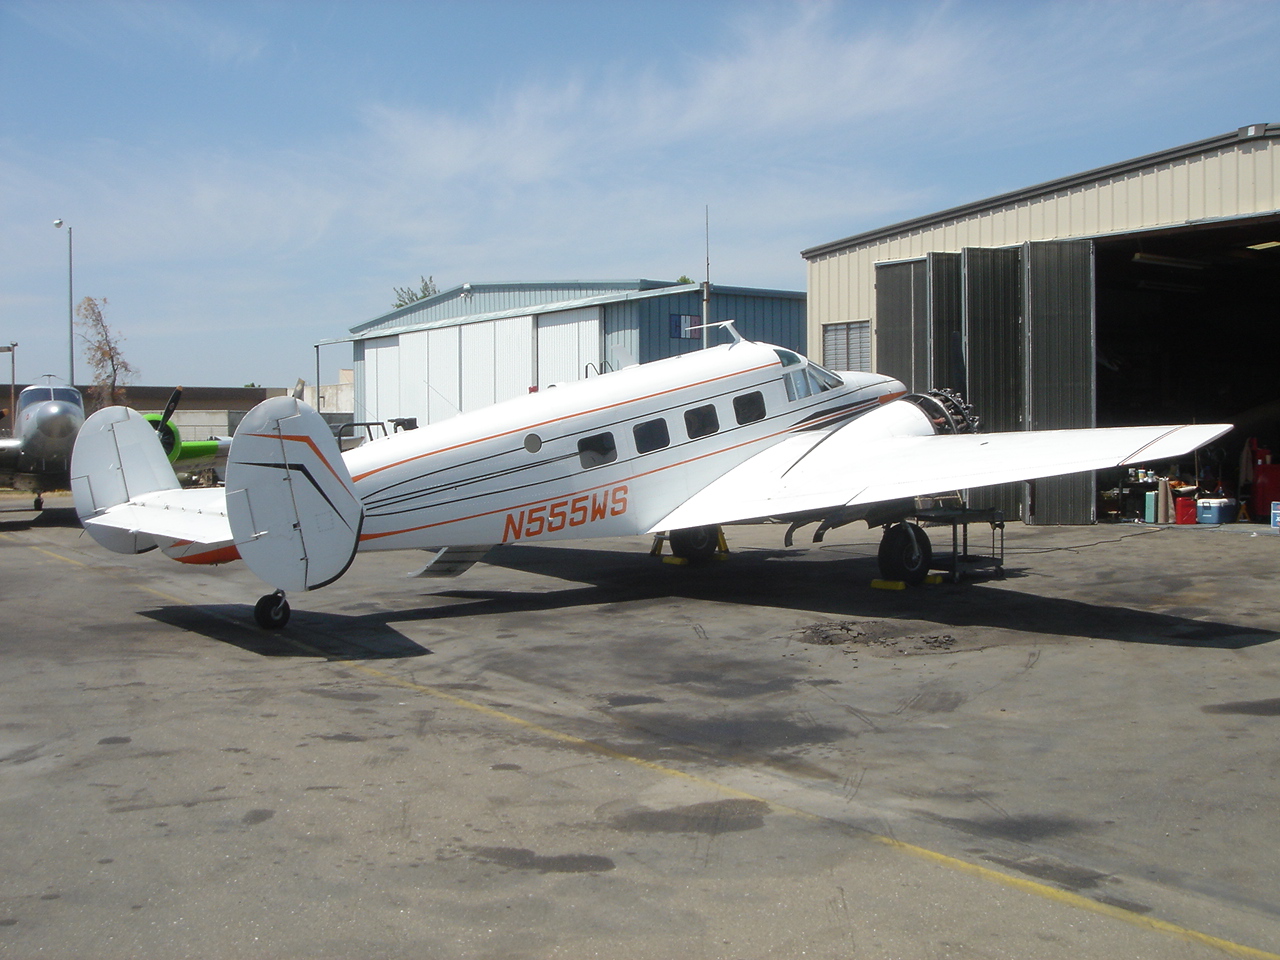
Here is one of the nicest Beech's that I have seen recently: E-18S N555WS. Beautiful maintenance and meticulously cared for by her owner.
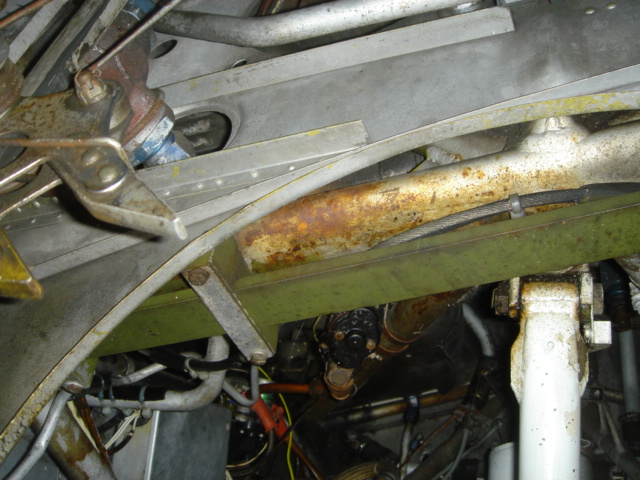
This is the truss in the outer wing panel. Note the surface rust in places that needs to be addressed to preserve the truss. Even the nicest aircraft need to have the spar cleaned and painted and preserved. This is hard to do as it is extremely difficult to access the whole truss. Many of the upper surfaces are right against the wing skins.
This is the main spar lower cap in the gear well. I recommend that at the next x-ray when the strap is removed that this spar should be cleaned and painted.
Here is another nice late model Beech which looks great from the outside.
Even though your Beech may be a 10 on the outside take a look at the inside and make sure that she is well cared for inside as well as out.
Here is an example of a spar with nice factory paint. In the back you can see the aluminized lacquer with nice fresh looking stenciling that says "HEAT TREATED ASS'Y". This was in a D-18S that has been well cared for.

Here is the same stenciling barely visible in the gear well (that is the feathering pump relay and oil cooler duct elbow) You can also see how the factory paint has worn off revealing the zinc chromate primer. Someone had cleaned off all of the paint to make a good ground for the relay clamp but rust is forming in the same area.
This is the spar from a Volpar Tri Gear aircraft that had a fresh annual. She was amazingly rough and was in severe need of attention. The spar had been crudely painted at one time but shows its age and condition. As I have said you can tell almost all that you need to know about how a Beech has been maintained, past and present, by looking in the gear well. This photo speaks volumes.
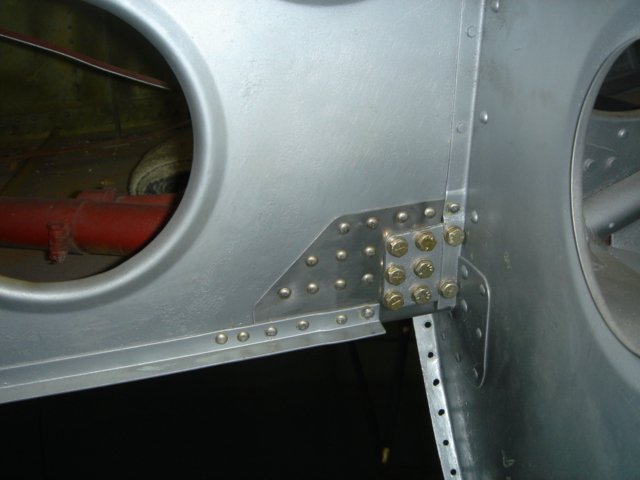
Here is the lower wing attach cluster at station 96. The U bolt is part of the Volpar mod. At least the spar will not rust with all of that grease and oil. The brown blobs are grease that dropped from the flap transmission that was poorly serviced by the last mechanic.
This is one of the modifications that makes up the Volpar Modification to the Tri Gear configuration. These are bolts that are mounted through holes drilled into the spar. The heads and nuts have been sealed to prevent moisture from entering the inside of the truss. The sealant can become old and brittle with age and may expose the inside of the spar to the atmosphere. It is important to make sure that this doesn't happen by complying with Volpars service bulletin on this matter. This involved removing the sealant, pulling several bolts to check for internal condition and then resealing all of the fasteners.
This is my response to questions asked by Kyle Larson on his forum at www.beech18.net
"Hello Kyle,
Thanks, by the way, for providing the Beech18.net web site and especially for this forum. It is just what we need. Well done!
In response to your questions:
Question 1:
Were these planes ever strapped or x-rayed? If so, when? Are they planes that have sat for 35+ years after the gov't "dumped" them (corrosion reasons, not cracking)?
Answer 1:
The three AT-11's that you are asking about with the Air Force Mod to the truss, were not strapped or recently x-rayed. They are from the batch of aircraft that were left to rot after the spar AD came out in 1975. Many Twin Beech's died that year as their owners decided that they weren't worth the cost of putting a spar strap on them. My business started by taking derelict Twin Beech's from the scrap heap and breathing life back into them. This is what I still do as well as maintaining flying aircraft. The three aircraft mentioned above were not dumped by the military because of spar problems. The AT-11 in our shop, which is pictured on my web page that has the massive internal rust, was modified by the military in 1952 just before it was sold as surplus. I don't think that the military would have put that effort into an aircraft that had problems. I believe that this mod accelerated the internal rust problems in this aircraft. The aircraft went on to fly with many different companies and individuals as most of our aircraft have. These were flying aircraft that were not worth all that much in 1975 and as a result of the spar AD were parked and their engines and props were sold off.
Question 2:
(AT-11) I realize you cant see internal corrosion, but the external is overwhelming, I would be suspect of internal corrosion with this much external (visual).
Answer 2:
The external corrosion may be overwhelming when compared to the condition of your spar but it is not that overwhelming when compared to the majority of Beech's that I have seen which are flying today.
It is a very difficult process to repaint the spar in a flyable Beech. There are so many things in the way such as controls, wiring, plumbing, spar strap, etc. that it is rare for a spar to have been thoroughly re painted. The factory finish on the spar was a primer coating of zinc chromate topped by a coating of aluminized lacquer or sometimes enamel. Then the spar was stenciled at the factory with "HEAT TREATED ASS'Y" in black paint in several locations (I have posted shots of this at the bottom of the same web page for you to look at http://www.twinbeech.com and click on the spar concerns button).
I evaluate the external condition of a spar by looking at what is left of the factory paint and stenciling. If I see that a majority of the factory paint is still on the truss even though there may be rust in places it has been my experience that it may not be all that bad inside. This has worked for me and my customers for many years but I always use the caveat that you cannot be certain until you have an x-ray.
One of the above mentioned AT-11's had severe rust on the outside the likes of which I had never seen before. Sure enough, it was bad on the inside and the spar has since been entirely replaced. The AT-11 in our shop had surface rust and places that were fairly bad but there was still a fair amount of factory paint left on the truss. My evaluation was that the inside may be questionable but I have seen worse externally that have passed x-ray. We took a chance and the inside was bad as a result of the Air Force Modification. I now know that this mod has caused the rapid acceleration of the internal corrosion. Once again, if your Beech has this modification to the slide tube cluster, and she hasn't been x-rayed lately please do so immediately!
You may think that some rust on the outside is unacceptable but a large percentage of the Beech 18's that I have looked at have rust that needs to be addressed. I have posted some pictures of aircraft that I have performed pre-purchase inspections on as a sample of what I am talking about. It has been all too common for me to walk up to a Beech that is beautiful on the outside. She may have; a gorgeous paint job and interior and fresh engines and lots of cool radios. These are all the things that the prospective buyer is really interested in and he falls in love with the aircraft. To me you can tell almost everything about a Beech 18 by poking your head up in the gear well. The quality of maintenance, past and present, and general condition is usually self evident inside the nacelle. This is also where you can get a good look at the spar in its most exposed spot. On my spar concerns web page are examples of nice Beech's that have had regular maintenance. You would think that the spars are as good as the outside but this is not necessarily the case in the majority of the aircraft that I have looked at. It has been my experience that most owners are blissfully unaware of the condition of their aircraft. I can't tell you how many owners are shocked to see what problems I have come up with inside their airframes. I would be met with disbelief if it weren't for the digital camera that I use. This camera lets me take the owner inside their aircraft so they can see what I am seeing. My experiences have led me to believe that a lot of owners are not in tune with their aircraft. I also believe that a lot of the mechanics and IA's that are working on and returning these Beech's to service are nowhere up to speed on the needs of a Beech 18. I am thankful that the Beech was so well designed that it can put up with lots of neglect but the other side of this double edge sword, is that it will not put up with the neglect forever. The Beech and those wonderful Pratt and Whitney’s usually gives you plenty of indications that it is time to fix something. The trick is to know how to listen to and interpret those indications before it is too late.
I had one first time customer in for an engine change on his D-18S. I poked my head up in his gear well and noticed that the gear chains were so loose that they rested on the slide tubes. I also noticed that the slide tube had been worn down by the trolley so much that there were three grooves in it from the wheels on the trolley. I brought this to the owner’s attention and he said he would check into it. He told me later that his mechanic said that was normal for Beech 18's and that they all were like that. Well, I don't profess to be an expert, but in my limited experience, I have never seen a gear system so worn out and I told him so. He just seemed annoyed. I think he figured I was just trying to drum up some work. I have seen the same attitudes displayed in the postings above. Some folks seem annoyed because this revision may cost them more money or reduce the value of their aircraft. Some speculate that this whole AD revision is being promoted by individuals that have a vested interest and are hoping to make a buck on the whole thing. Please think again. Consider that maybe there are a few of us who have seen some patterns emerge in the Beech 18 that raise flags. Consider too that maybe there are some folks who are genuinely concerned about safety and, based on our experiences, a revision to this AD is a good idea.
I don’t think that my wing is going to fall off anytime soon but I almost did have one come off. If it wasn’t for that AD that so many people have said is a load of crap, I and possibly four of my passengers would be dead now. I guess that makes me biased…too bad!
I sincerely hope that your spar is in perfect condition just like I hope the spars in my Beech’s are good too. I know that many aircraft will be severely affected by this change and I also think that it will save lives in the long run. We will all have to endure these repetitive inspections so we can ensure the safety of our passengers and our aircraft. I know that some of you will be shocked at what the x-ray will show and others will say see I told you my spar was okay but at least we will know exactly where we stand.
I will get off my soap box now, back to the questions.
Question 3:
When was the last time they were inspected (annualed)? In your opinion, would a punch test suffice in certain areas(much like the piper struts)?
Answer 3:
All of the examples that I have just posted on my web page were pre purchase inspections and most of them had "fresh annuals" Now there is a term that has a wide and varied meaning!
I am not familiar with the punch test procedures that you are referring to.
Question 4:
On the theory of eddy current or ultra sound, couldn't you just drop the spar w/o complete removal and gain 3+ inches over most of the length (Aerospace spar anyway)?
For most of the strap kits that I am familiar with, you will first have to remove the tension or preload on the strap. Then to get three inches of clearance you would most likely have to unbolt the straps from their clamps and each other to drop them. This is going to require almost the same amount of effort as is needed to do the x-ray. I am not sure that you are saving that much time or effort. How long will it take for someone to eddy current the required areas? What record will we have for comparison? How do you show what stations were checked? The x-ray has metal bands or clamps to identify specific wing stations and lead letters to identify the side and location. The films make a permanent record. Can the eddy current provide the same record? I need to learn more about this process.
Question 5:
48 months on a new AD for everyone (acceptable to me), but you get a clean x-ray, what would you recommend after that?
Answer 5:
This is just what I am trying to work out. Gail Flagor, an awesome Beech 18 x-ray guy in the LA area has been doing my x-rays for decades. He has been doing them since 1975 I believe. I asked him about this and he thinks that if the spar doesn't have corrosion now it is not likely to have it any time soon. I agree with this as long as the spar is still sealed and is properly preserved. If a spar is good then I think 48 months is too short an interval. I believe that the length of the repetition should be commensurate with the present condition of the spar. I think something like the Hamilton Standard Prop AD would be more appropriate.
Just exactly what that schedule should be is what my little brain is wrestling with. I am still taking in information and formulating my response.
I think that we can come up with a schedule that will provide the best balance of safety and economy.
Question 6:
It seems there is little discussion about the 18's that weren't modified by beech after military use, would you go for a longer period on the "tall cabins"?
Answer 6:
I don’t see how you can differentiate between the various models of the Beech 18 with respect to this matter. I believe that the C models are more prone to cracking and have older spars but that is about it. How can you say that aircraft made during a specific time at the factory will be okay and others are not? I think that just like the original AD all of our Beech’s are from the same family. The last Beech 18 made and delivered to Japan Airlines could just as easily have the same corrosion problems as the AT-11 sitting near my office.
As for the tall cabin aircraft are concerned, I was just flight training an initial multi student today in his C-45H which happens to be a tall cabin aircraft. His spar was made in 1953 along with all of the D-18S aircraft of the time. This is the same exact spar that was used in the later aircraft so I don’t see how we can separate out any of the different models.
Question 7:
Cracks are a concern, would a dye pentrant be acceptable and if so, what interval would you recommend (assuming the current x-ray AD didn't change)?
Answer 7:
Dye penetrant is good for surface cracks and it is what we use on the control column and elevator arm inspection. I don’t think it will be that efficient over the whole spar. Cracks are actually allowed on the spar in certain areas. Some of the cracks come from the manufacturing process and were in the spar before the aircraft was built around it. Beech has some guidelines that specify what is allowed and where. Some of the specs are kind of eye opening to me but it is acceptable data. One of the nice things about the x-rays is that you can keep a close eye on existing crack growth by comparing the films from one inspection to the next.
Question 8:
Formulating exactly what the interval for the specific aircraft will be the key to revising this AD, I agree, and I think we need some uniformity of everyone to approach the FAA on. What would you recommend?
Answer 8:
See 4A above
Question 9:
What are your thoughts on the reoiling (annually) of the spar?
Answer 9:
I think that a renewed preservation of the inside of the truss is a great idea. This will slow down any corrosion that is present and will hopefully prevent any future growth from forming. The Linseed oil has done a good job considering how long these spars have lasted. I hate to mess with a good thing but I would like to explore alternative preservatives. I am curious as to what the MIL-C-16173, grade 2 preservative is as specified in the Volpar SB. Is this the best possible material to use for longevity?
What ever is used should be compatible with the linseed oil presently inside the spar.
My interpretation of the revision is that the corrosion protection program is due every 4 years. I would think that this interval would depend on the properties of the preservative. If we could find a proven long lasting preservative then we should be able to base the re oiling on that data.
If it is possible I would like to see a dye introduced into the preservative so it might bleed and become visible during inspections.
Opening up the spar when it has been sealed does concern me although I do think that we can develop a method that will insure that the inside of the truss can be effectively resealed.
Question 10:
Just curious, what can you do for the spar on that AT-11? Is it salvageable? Or does it need complete spar replacement ouch)?
Answer 10:
After seeing what came out of the spar in the way of scale, the owner decided that he wanted the whole truss replaced. I can’t blame him and I applaud his attitude. This AT-11 is a Warbird that trained hundreds of student bombardiers at Victorville Army Air Field in California. It played an important part in our countries history and the owner fully appreciates this. It would be easy to just send this airframe off to a museum as a static display but he wants to make her fly again. What a great attitude!
I am looking or a replacement spar for this AT-11. I would like to put a D or later model spar into this aircraft. If you know of one in a torn up airframe that may be available please let us know as this is a very worthy project. I don’t want to destroy an airframe that could possibly fly again so I hope to find a wreck with a straight spar.
I wonder how long it will be before we have to tool up and make spars from scratch. I bet we could make it out of stainless steel and engineer it so that it wouldn’t need a strap.
Thanks again Kyle for your efforts!"
NEW: Vintage Aircraft is now offering wing spar x-rays for the Beech 18. We can now provide you with a complete x-ray and spar condition evaluation. We will remove your spar strap as necessary to give access for the x-ray inspection and we will do a condition inspection on your strap. We will re install your strap to its manufacturers specifications. You will receive the x-ray films, the written report and a CD full of digital pictures of your spar and the inside of your wing and truss structure.
We also offer modifications to your airframe to make it easier to remove and replace your spar strap the next time. It is pretty much a certainty that the revision to the spar inspection airworthiness directive will require repetitive inspections based on the calendar as well as airframe hours. Making it easier to remove the strap for future inspections will save you shop labor in the future.
Prices for the complete inspection will vary depending on what kind of strap you have and the time required to remove and replace it so call or e-mail for details.
We also offer the best, most streamlined, spar strap kit which is the only one available today. Click here for more information